School of Rock Builds: Introduction
Welcome to the School of Rock!
This article outlines the required builds and items you’ll need in order to join as a Team GCROCK Recruit. Once you’ve got the builds ready, we’ll assign you the recruit role and begin the training process to prepare you for the team.
If you’re already an experienced player and would like to support Team GCROCK without going through the full School of Rock program, you can opt to become a Team GCROCK Reserve in my Discord server. Reserves are called upon occasionally to step in and support myself and the team when numbers are low.
👉 For more information on what Team GCROCK is all about, check out this link: Team GCROCK Introduction
Mandatory Builds
Striker DPS Build
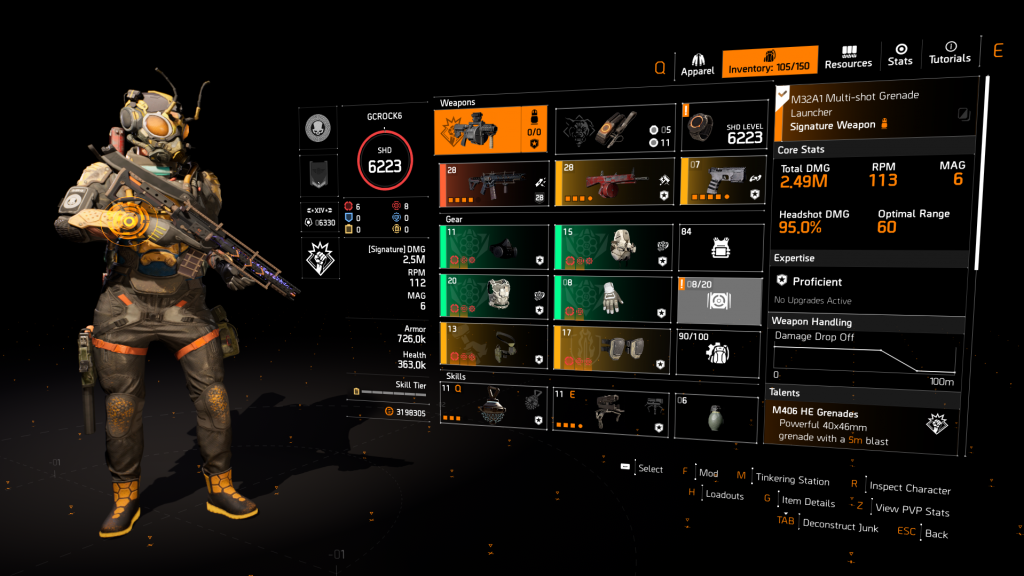
There are plenty of ways you can set up this build. The example shown in the image uses 4 pieces of Striker (Mask, Backpack, Chest, and Gloves), paired with a Ceska Holster and Fox’s Prayer Kneepads. Every piece is rolled with Critical Hit Damage, with Critical Hit Chance added on the Holster. For the three mod slots you will want to equip Critical Hit Damage mods.
For weapons and specialization, it runs the Grenade Launcher, the St. Elmo’s AR, and the Lefty Shotgun. The sidearm doesn’t matter. St. Elmo’s can also be swapped out for another weapon if you prefer. Skills are flexible too, but having a Revive Hive and an Assault Turret saved is always a good option.
Another variation is to drop the Striker Chest and instead run a Ceska Chest with Glass Cannon, while moving Striker onto the Holster. If you’d rather use a chest with Obliterate, that works too.
The key is to keep this build versatile, because you’ll also want to be able to quickly convert it into:
- Tardigrade Build (With Sharpshooter Specialization and the Tactical Drone)
- Coyote’s Mask Build
- Tamper Proof Build
The conversion is simple. Just keep either a Striker Holster or Striker Kneepads rolled with Crit Damage, along with an Exotic Coyote’s Mask, Exotic Tardigrade Chest Piece, and a Ceska Chest Piece with Crit Chance, Crit Damage, and Tamper Proof.
This makes it easy to hot-swap between variants whenever needed. Or, like I do, you can dedicate a raid character with all these versions saved in loadout slots. The Tardigrade version is ideal to have saved as you want to switch to the Sharpshooter Specialization when you use it.
HazPro Tank Build
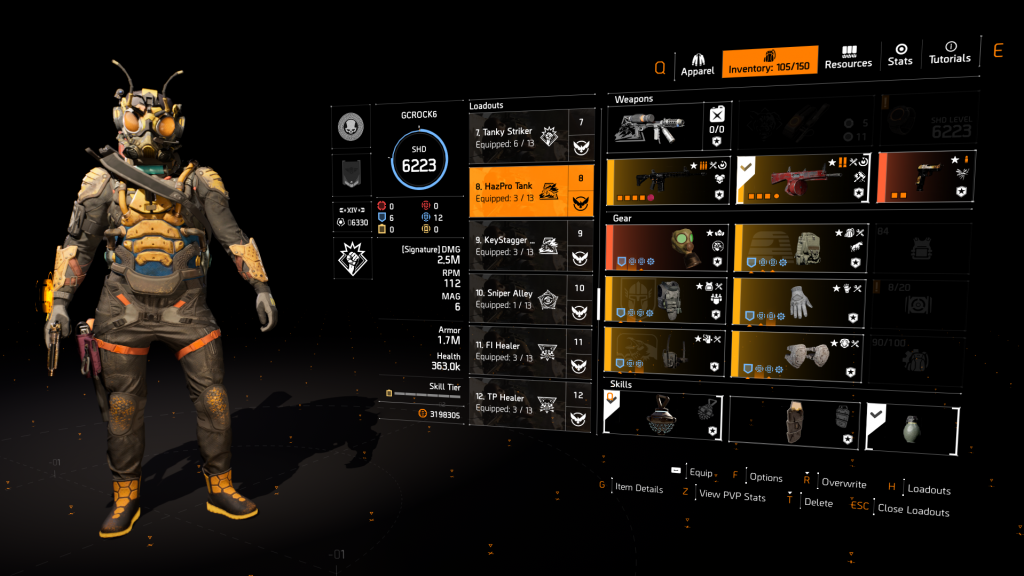
Start this build with the Firewall Specialization. Your weapons will rotate depending on the encounter, but you’ll generally want a high-end assault rifle, the Lefty, the Exotic Mosquito sidearm, and the Exotic Scorpio shotgun.
For gear, the Exotic Catharsis Mask is essential. Pair this with the named Pointman Chest Piece, rolled for Hazard Protection and Armor Regeneration. Your backpack should be a Belstone piece, rolled to Hazard Protection, Armor Regeneration, and with the Adrenaline Rush talent. This piece can be tough to farm, so if you need to drop one attribute, let go of Armor Regen.
The remaining slots should be two Improvised pieces and a Yaahl piece—all rolled for Hazard Protection and Armor Regeneration. If you don’t have Yaahl, you can swap it for a third Improvised piece with no real downside.
- With a Yaahl piece, you’ll have 5 mod slots and should run Protection from Elites mods.
- With three Improvised pieces, you’ll have 6 mod slots—equip 5 Protection from Elites mods and 1 Burn Resistance mod.
For skills, run a Bulwark Shield and a Revive Hive as your base setup, though you can swap depending on the situation.
Key/Stagger Tank Build
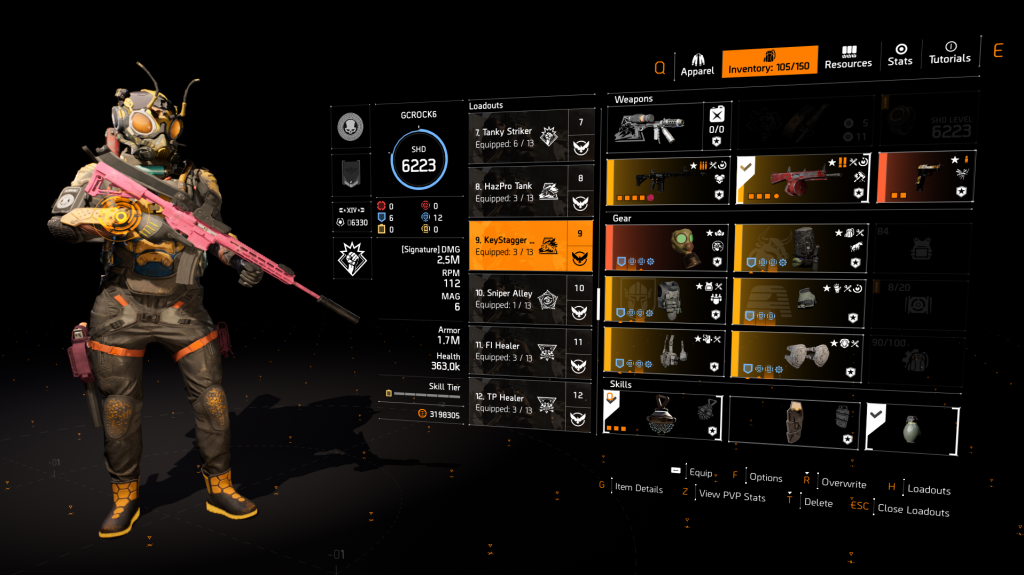
This build is very similar to the HazPro Tank setup I shared earlier. You’ll want to start with the Firewall Specialization, though the Grenade Launcher Specialization works as an alternative.
Your weapon choice depends on your role: either the Exotic Scorpio shotgun or the Exotic Mosquito sidearm, with the Lefty as your secondary.
For gear, you’ll once again be using the Exotic Catharsis mask, paired with the named Pointman chest piece rolled with Explosive Resistance and Armor Regen. The backpack should be either a Belstone or Lengmo piece, rolled with Explosive Resistance, Armor Regen, and the Adrenaline Rush talent. The remaining pieces should be two improvised items plus either a Belstone or Lengmo piece, depending on which brand you’re running on the backpack.
Since the backpack can be tough to farm, Armor Regen is the stat you can afford to drop if needed. This build comes with five mod slots, where you’ll want to equip Protection from Elite mods.
For skills, it depends on your role, but it’s good to keep a Revive Hive and a Bulwark Shield saved.
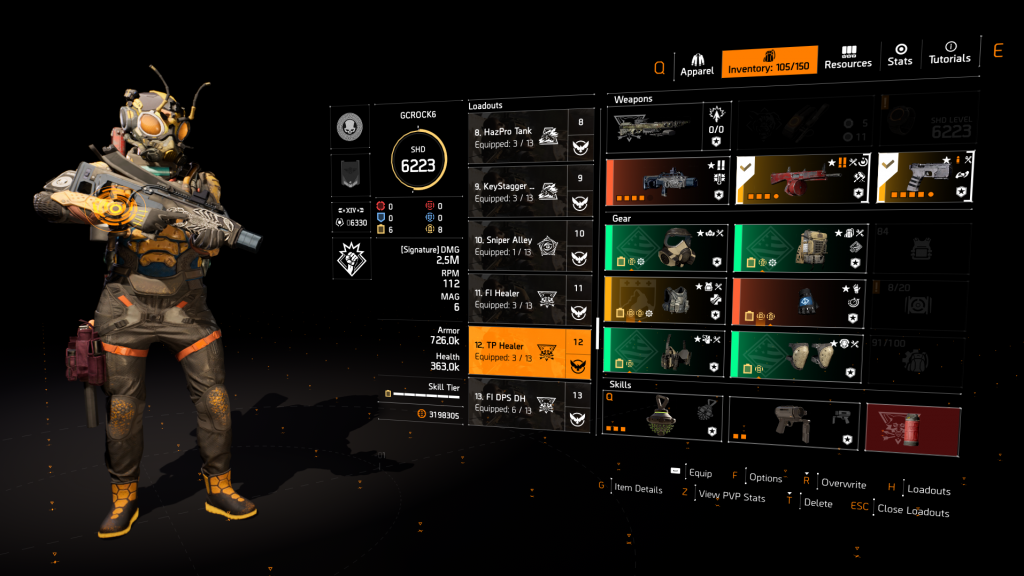
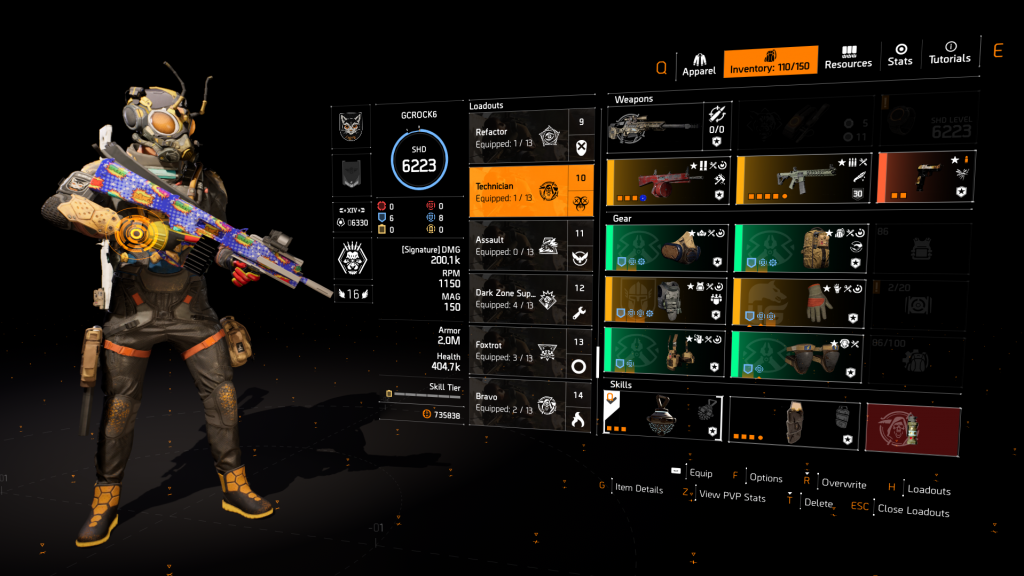
Future Initiative Healer Build
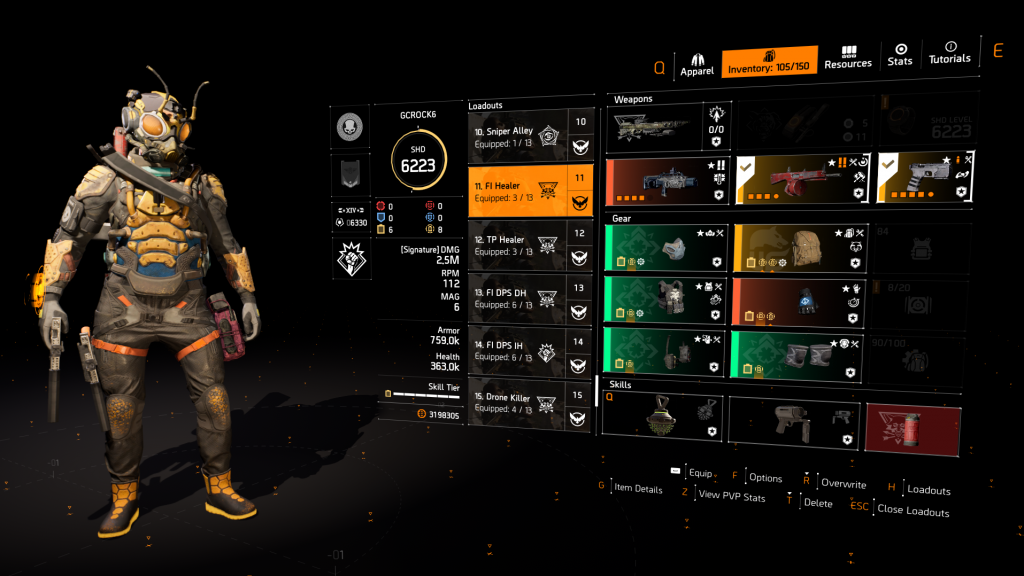
This is the go-to healer build that works across a huge amount of content! Start with the Survivalist Specialization (You will switch to Technician for the Lovebirds on Paradise Lost). For your gear, run four pieces of Future Initiative on the Mask, Chest, Holster, and Kneepads. All should be rolled to Repair Skills.
Your Backpack will be The Setup, which can be a tough farm. Ideally, it should roll with Skill Tier, Repair Skills, and Skill Haste, but don’t worry if it isn’t perfect—having Skill Tier with either Repair Skills or Skill Haste is more than enough. The final piece is the Exotic BTSU Gloves, and you’ll want to slot Repair Skill mods wherever possible.
For the weapons you want the Exotic Scorpio Shotgun and the Lefty, the sidearm doesn’t matter. For skills, run the Restorer Hive and the Reinforcer Chem Launcher.
Drone Killer Build
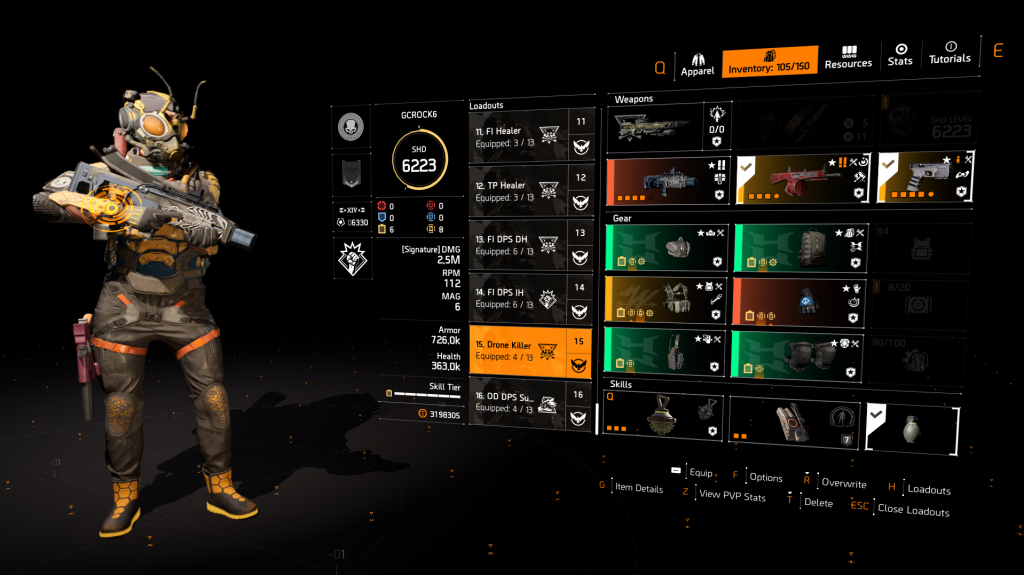
The Drone Killer build is a must-have for a smooth Razorback run in Dark Hours. Start with the Survivalist Specialization and equip four Hard Wired pieces (Mask, Backpack, Holster, Kneepads), all rolled for Skill Damage.
Your chest piece should be a Wyvern chest with Skill Damage, Repair Skills, and Glass Cannon. This can be a tough farm, so it’s fine to drop Repair Skills if needed. The final piece is the Exotic BTSU Gloves. For your mod slots, use Repair Skill mods.
For your primary you want the Exotic Scorpio shotgun and the rest don’t matter. For skills, run a Jammer Pulse alongside the Restorer Hive to round out the build.
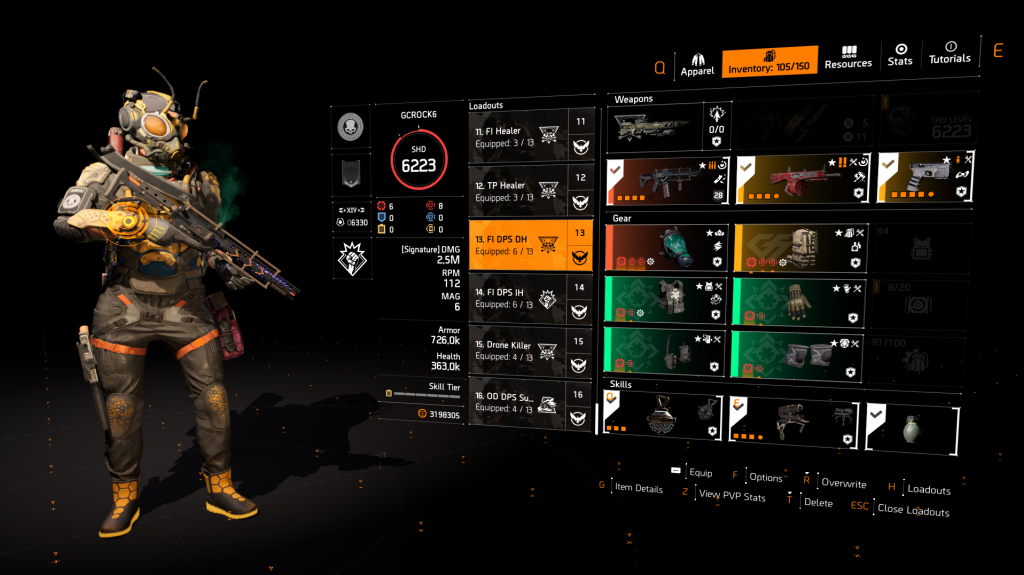
Ongoing Directive Overwatch/Opportunistic Build
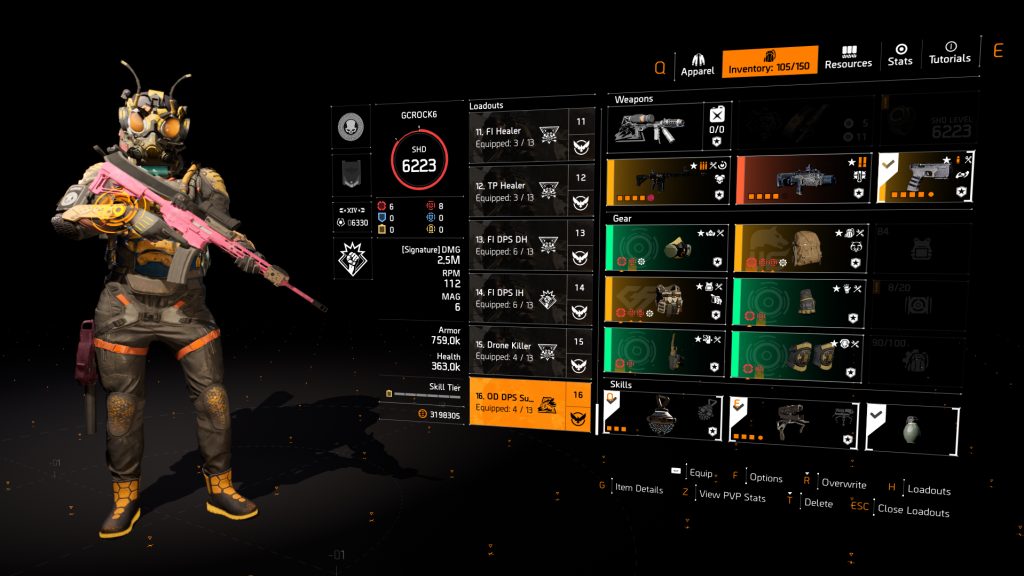
This is the final mandatory build, and it’s the one that ties everything together by giving your team a huge boost in overall damage output!
In the example shown, I’m using the Firewall specialization, but you can swap this out for either Survivalist or Demolitionist. The choice isn’t critical—each one shines in different encounters.
For weapons, the primary is a high-end assault rifle (Carbine 7) rolled with Damage to Targets Out of Cover and the Vindictive talent. This setup is excellent in certain fights, though less effective in others. Feel free to use whichever high-end AR you prefer and tailor it to your liking. The secondary weapon must be the Exotic Scorpio shotgun, while the sidearm isn’t important.
The gear setup runs four pieces of Ongoing Directive on the Mask, Gloves, Holster, and Kneepads, all rolled for Critical Hit Damage. The Chest is a Grupo piece with Critical Hit Chance, Critical Hit Damage, and the Overwatch talent. The Backpack is The Setup, ideally rolled with Weapon Damage, Critical Hit Chance, and Critical Hit Damage. Don’t stress if you can’t get the perfect rolls—Weapon Damage plus one of the others is good enough. Equip Critical Hit Damage mods in the mod slots.
For skills, you’ll rotate depending on the situation, but always keep the Revive Hive and Assault Turret saved as your go-to options.
With the builds above, you’re ready to enrol in the School of Rock. From there, we’ll train you to support us across all of the endgame content we cover.
These aren’t the only builds we use, though. If you want to go the extra mile and create even more synergy during our helping runs, there are a few optional builds that are great to have. Keep in mind, these “nice-to-have” builds aren’t required, and some can be very tough to farm.
Nice to Have Builds
Tanky Striker Build
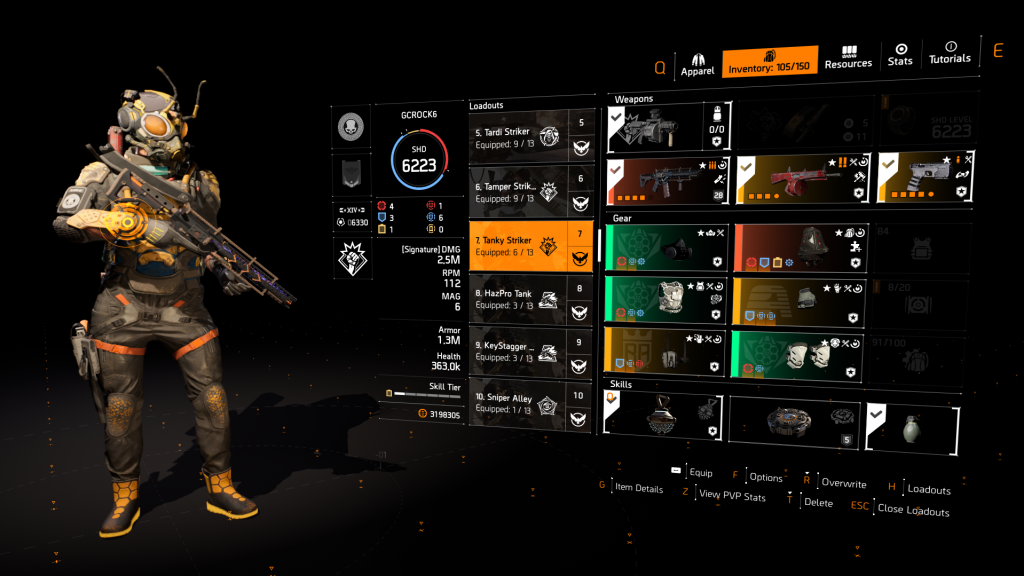
The Tanky Striker build is designed specifically for the Morozova final boss encounter in the Iron Horse raid. This fight isn’t purely about DPS—it requires playing the mechanics correctly—so this build was made to make things much smoother.
Start with the Demolitionist specialization. For weapons, I use St. Elmo’s Assault Rifle and the Lefty, with the sidearm being irrelevant. You can also swap St. Elmo’s for any assault rifle you prefer.
The build itself is fairly easy to farm. You’ll need three Striker pieces, including the Striker chest, all rolled with Explosive Resistance. Add the Picaro’s Holster, also rolled to Explosive Resistance, plus a Belstone piece with Explosive Resistance and Armor Regen. To finish the setup, use the Exotic NinjaBike Backpack. Equip Protection from Elite mods in the mod slots.
Skill choices come down to preference. I typically run Revive Hive and Decoy, though I’ll sometimes swap the Decoy for a Crusader Shield depending on my positioning during the encounter.
Sniper Alley Build
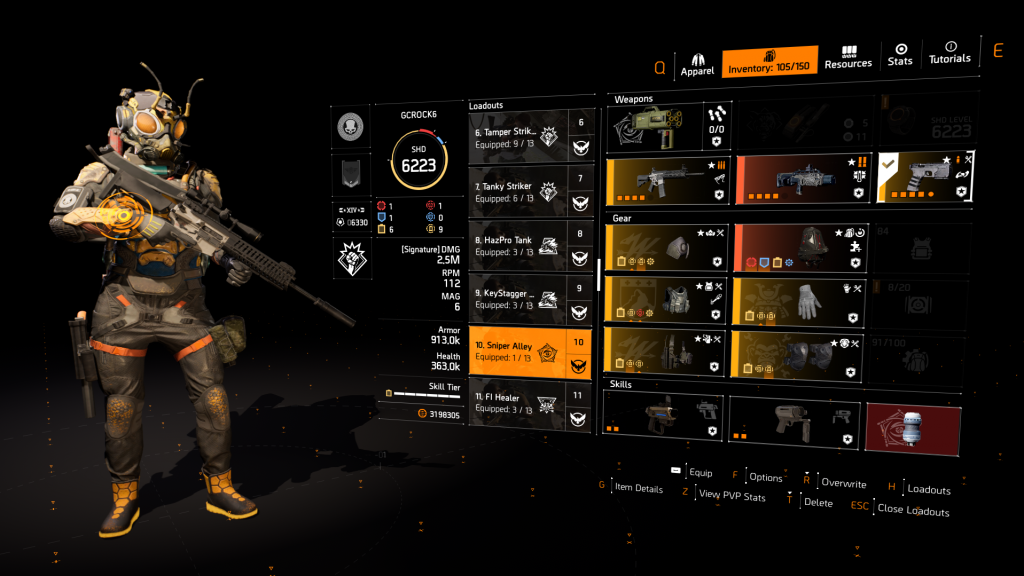
The Sniper Alley Build is only used for about 60 seconds in the Iron Horse raid, and it’s not even for a full encounter. Its sole purpose is to make grabbing the third raid key easier by quickly dealing with the sniper mechanic.
Start with the Technician Specialization, making sure you benefit from the extra skill damage. Weapons are irrelevant here since you won’t be using them.
For gear, equip the Exotic NinjaBike Backpack and the named Grease Shiny Monkey Kneepads with Skill Damage rolled. The rest of the setup consists of two Wyvern pieces, one Alps Summit piece, and one Murakami piece—all rolled with Status Effects and Skill Damage. On the chest, run Glass Cannon. This piece can be a tough farm, so it’s fine to drop the Skill Damage roll if needed.
All mod slots should be filled with Skill Duration mods. The skills you’ll use are the Sticky EMP and the Oxidizer.
True Patriot Healer Build
The True Patriot Healer Build is a strong alternative to the standard Future Initiative setup, offering additional team synergy that boosts overall damage for raids.
You’ll run the Survivalist specialization and equip either the Exotic Scorpio shotgun or an assault rifle of your choice (depending on the encounter), with the Lefty as your secondary. The sidearm isn’t important for this build.
Farming can be tough, as you’ll need four True Patriot pieces (Mask, Backpack, Holster, and Kneepads), each rolled with Repair Skills so you can set the core to Skill Tier.
To complete the build, add the Exotic BTSU gloves and an Alps chest piece with Skill Haste, Repair Skills, and the Empathic Resolve talent. Slot in Repair Skill Mods, and for skills, run the Restorer Hive and Reinforcer Chem Launcher.
Future Initiative DPS Build
The Future Initiative DPS build is designed for raids when another teammate is running the True Patriot Healer build. Its purpose is to ensure the group still benefits from the Future Initiative team damage buff.
The specialization depends on the raid:
- Survivalist for Dark Hours
- Demolitionist for Iron Horse
For weapons, I run the Exotic St. Elmo’s as my primary, though you can use any weapon you prefer for this style of build. The secondary is the Lefty, and the sidearm choice doesn’t matter.
Farming this build can be challenging since you’ll need four Future Initiative pieces (chest, gloves, holster, and kneepads) with Critical Hit Damage already rolled, allowing you to swap the core to Weapon Damage.
To complete the build, use the Exotic Coyote’s Mask and a Grupo Backpack rolled with Critical Hit Chance, Critical Hit Damage, and the Vigilance talent. Equip Critical Hit Damage mods throughout.
Skills will vary depending on the encounter, but it’s best to keep a Revive Hive and Assault Turret ready.
Centurion’s Striker Backfire Build
This build is designed exclusively for the final encounter in the Paradise Lost Incursion and makes short work of the Lovebirds.
Start with the Demolitionist specialization. Your primary weapon will be the Exotic Backfire, supported by an ACS-12 with Damage to Targets Out of Cover and the Brazen talent. The sidearm is irrelevant.
For gear, use four Striker pieces (mask, chest, gloves, kneepads), each rolled with Critical Hit Damage. Pair these with the named Vigil backpack (Critical Hit Chance and Critical Hit Damage) and the Exotic Centurion’s Scabbard holster.
Equip Critical Hit Damage mods in all available slots. For skills, run the Booster Hive alongside a Decoy.
Dodge City Striker Bighorn Build
This build is designed specifically for the Williams boss fight in the Paradise Lost Incursion, making one-phase damage checks simple and reliable.
You’ll want to start with the Firewall specialization. For weapons, run the Exotic Bighorn as your primary, and an ACS-12 with Damage to Target Out of Cover and the talent Brazen as your secondary. For your sidearm, the Harvest with Damage to Target Out of Cover and Flatline is ideal, but if you don’t have it, a D50 is a solid alternative.
On the gear side, use four Striker pieces (mask, backpack, chest, and kneepads), all rolled with Headshot Damage. Pair this with Providence gloves rolled to Headshot Damage and Weapon Handling, and finish with the Exotic Dodge City Gunslinger Holster.
Fill all available mod slots with Headshot Damage mods, and for skills, run the Firewall Crusader Shield alongside the Achilles Pulse.
Measured Assembly Build
This is a very niche build designed specifically for the final boss encounter in the Paradise Lost Incursion. Its purpose is to make quick work of the Lovebirds.
You’ll want to start with the Sharpshooter Specialization and equip the Lefty as your primary weapon. The other weapon slots are irrelevant.
For the gear, use four pieces of Measured Assembly on the mask, backpack, holster, and kneepads. The key here is ensuring each piece has Armor as the core attribute. The secondary attribute isn’t critical, but Hazard Protection or Explosive Resistance can provide some extra utility.
The remaining slots should be the named Pointman chest piece and Uzina Getica gloves. Once again, Hazard Protection or Explosive Resistance are nice bonuses, though not essential. All available mod slots should be filled with Protection from Elite mods.
Finally, the skills for this build are the Revive Hive and a Bulwark Shield.
And that’s a wrap! Good luck farming these builds, and remember you can always open up a build LFG channel in the GCROCK server to link up with others. Team farming makes the grind so much easier!
I’ll continue to update my strategies and build setups over time, and this page will be kept current as changes happen. If you join Team GCROCK, you may be asked to make adjustments in the future. That’s just the nature of a live game—we’re always getting new gear, and sometimes we have to adapt our builds for the better.
This article was last updated on September 7th, 2025. If you have any questions or feedback, feel free to reach out to us!